July 15, 2012

Spicy Crab Cucumber Cups


This weekend was full of good, homemade food -- And lots of it!

Friday: Venison Cheese Steaks & Smores
Saturday: Monte Cristos, Spicy Crab Cucumber Cups, Venison cheese burgers, spaghetti & Meatballs.
Sunday: Mini egg tartlets in Mini Phyllo Cups & pound cake

I planned the entire weekend around food, in case we didn't know what to do, we could at least know what we were eating for breakfast lunch & dinner. Not really considering that by the time we would get to the spaghetti and meatballs, we would be too full to even think about more food.

Never the less, Matt and I cleaned up around the house and went grocery shopping with a long list of ingredients needed for the weekend activities. The only thing not found at food lion -- Crab meat! So we headed on down to Captain Chris's and picked crabs that evening for dinner. He got the big boys, which had a ridiculous amount of back fin meat!


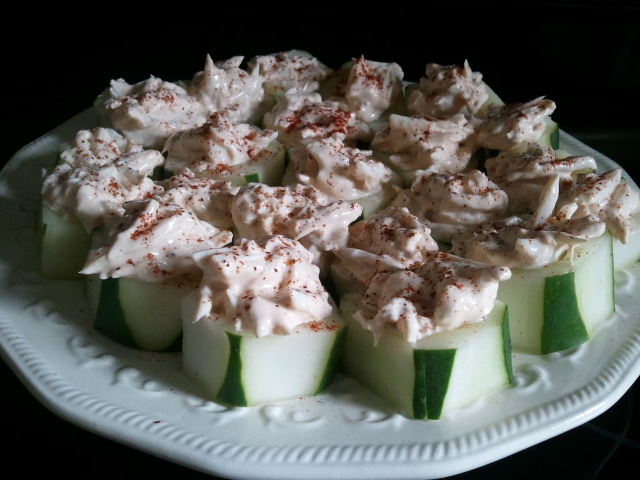
I really enjoyed how light and spicy these little Spicy Crab Cucumber Cups are. I found this recipe from pinterest but made it a little differently. Mainly sriracha sauce instead of Tabasco, and add in LOTS of old bay.

Spicy Crab Cucumber Cups


Ingredients

  • 3 whole Long Cucumbers
  • ¼ cups Sour Cream
  • ¼ cups Cream Cheese
  • ¾ cups Crab Meat
  • 2 teaspoon Sriracha 
  • 1 teaspoon Brown Mustard
  • ½ teaspoons Salt
  • 1 teaspoons Black Pepper
  • 3 teaspoons Old Bay
  • 2 teaspoon Chili powder


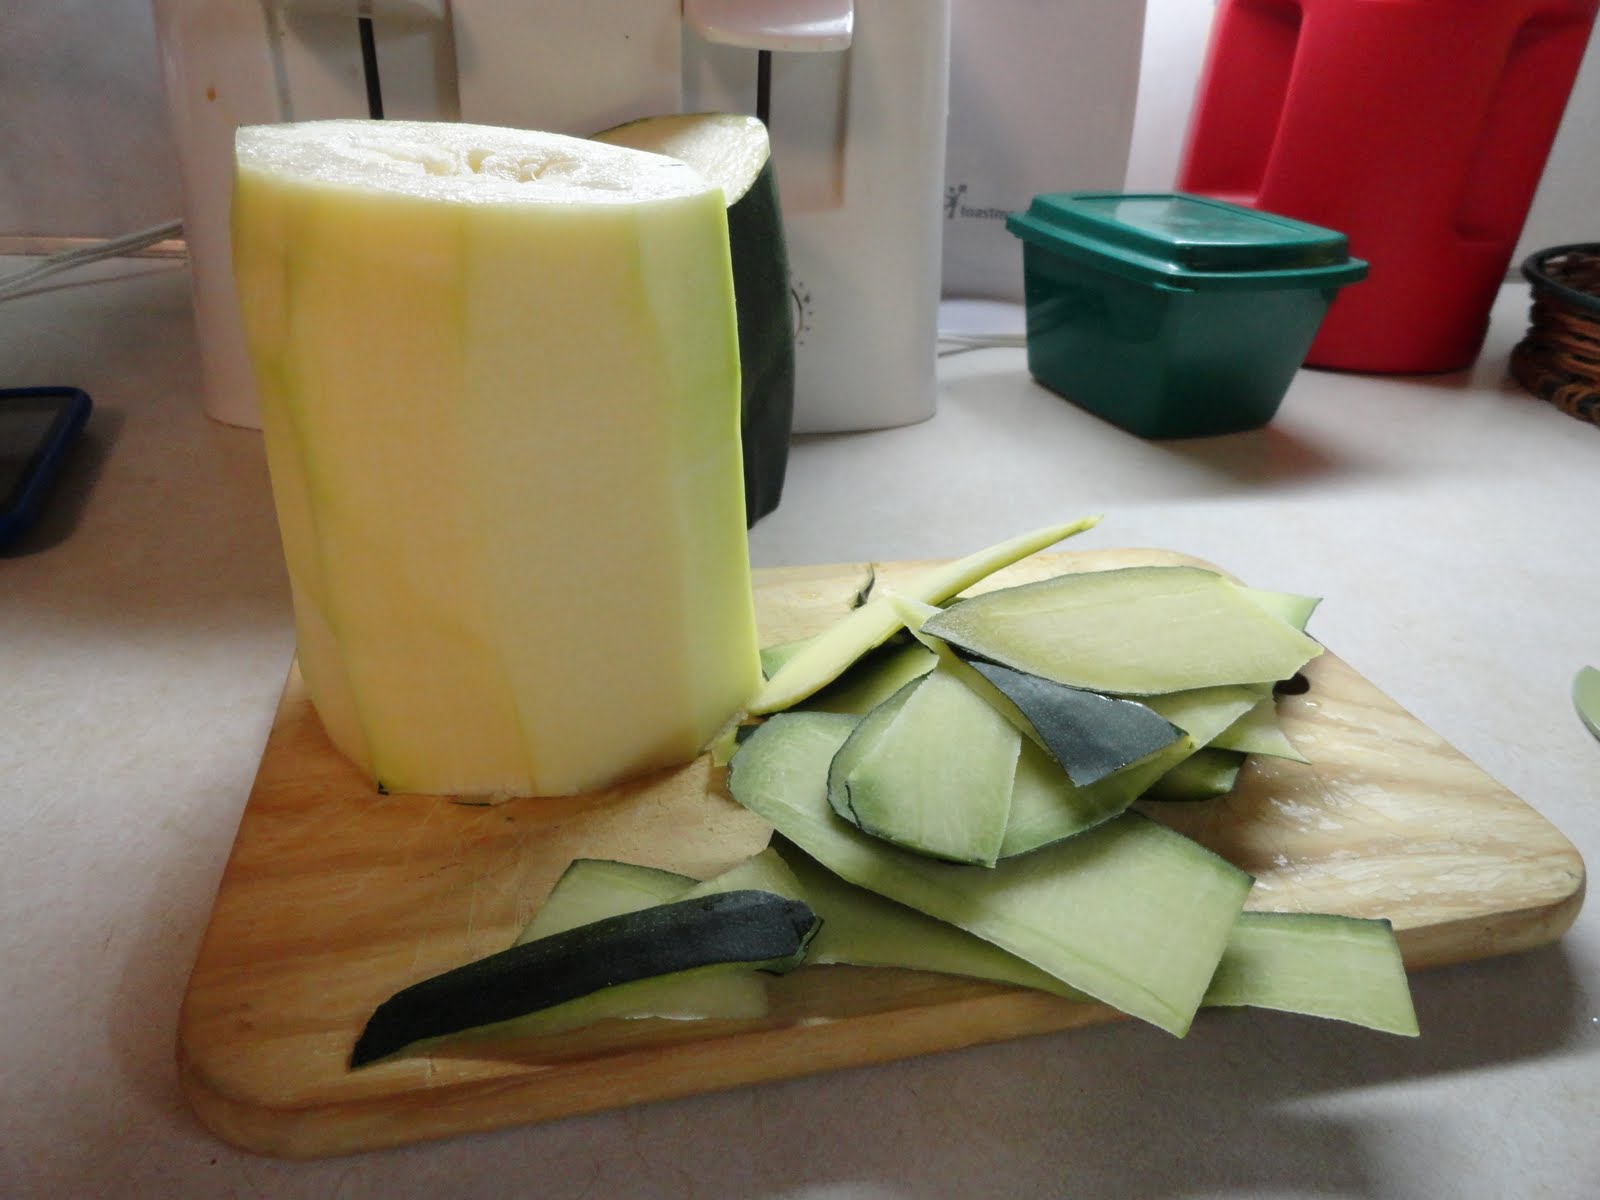
Remove the peel from the cucumbers using a vegetable peeler. Cut the cucumber into 1-2 inch rounds/slices.


Using a small melon baller, scoop out most of the inside seed part of the rounds. Note: You want to leave the walls and a thick portion of the bottom intact.


In a bowl, combine the sour cream and the cream cheese (softened) with a fork until well combined. Add the remaining ingredients besides the crab meat and stir until combined. Fold in the Crab meat.


Fill each of the cucumber cups with the crab dip. The melon baller worked very well for picking up the right amount of filling for each cup.

Sprinkle the top of each cup with a mixture of chili powder and old bay.


Refrigerate until ready to serve. Serve within 2 hours of making.


Note: Original recipe by Tasty Kitchen

March 26, 2012

Asparagus and Chicken Pasta


Mom and dad are out picking up Mom's new car and trading in my Wonda. It's kind of a bitter sweet day for me. How do you say good bye to your very first car? I need to make myself some comfort food with my favorite veggie -- Asparagus! That makes it healthy... right?

Asparagus and Chicken Pasta


Ingredients
  • Asparagus
  • Chicken
  • Milk
  • Vegetable Oil
  • Cream of Asparagus Soup
  • Pasta of your choice, I used Large Shells
  • Shredded Swiss cheese

  1. Add 2 tbsp of vegetable oil in a skillet on medium heat
  2. Add in chicken cut to bite size pieces
  3. Season with salt and pepper
  4. Let cook for 10-15 minutes
  5. Cut asparagus stalks to 1/2" - 1" bite size pieces
  6. Add into the skillet with the chicken
  7. Add 1/4 cup water and cover for 10 minutes
  8. Add cream of asparagus soup
  9. Add 1/3 cup milk
  10. Add 1/3 cup of shredded Swiss cheese
  11. Let simmer for 10 minutes
  12. Add in cooked pasta
  13. Garnish with uncut cooked Asparagus

And there you have it... and it was TASTY! 

xoxox,
Michie

March 20, 2012

Chocolate Dr Pepper Cake!

For Matthew's birthday and for the fact that I will be out of the country for it, I decided to make a cake demonstrating his two favorite things: Dr Pepper and PORTAL! Well maybe not his most favorite... but close. So I made this before I left. I was pretty proud of how it turned out... Minus the runny-ness of the icing. It made it easier to apply all the chocolate jimmies. I did not get to try it out, but I heard good things.

Dr Pepper Cake! Portal Style!

  •  
  • Ingredients
  • 1 cup butter, 1 cup Dr. Pepper cola, 2 eggs, ½ cup buttermilk, 1 teaspoon baking soda, 1 teaspoon vanilla, 4 tablespoons cocoa, 1 ½ teaspoons cinnamon, 2 cups flour, 2 cups sugar
  • ICING
  • ¼ cup butter, 3 tablespoons cocoa, Chocolate Sprinkles, ¼ cup Dr. Pepper cola, Little less than 1 box powdered sugar, Jar of Maraschino cherries, White Icing
Directions:


1 Heat 1 Cup of butter and Dr Pepper
2 Add the cocoa, cinnamon, flour and sugar to the butter mixture
3 Mix the eggs, buttermilk, soda and vanilla and add to the rest of the mixture
4 Pour into prepared 8 or 9 inch pans
5 Bake 30 minutes at 350 degrees.


DR PEPPER ICING 

6 Heat butter, Dr Pepper and cocoa stirring until well blended.

7 Stir in powdered sugar and a little cherry syrup

8 Frost cake by pouring icing on cake
9 Cover with Sprinkles
10 Make cheery supports with white icing
11 Place cherries

October 29, 2011

Spider Rings!


Happy Halloween, everyone!
This year I was invited to a handful of parties, but only decided to go to my Aunts 40th surprise party Friday, and help out with my best friend Christy's party at her new house Saturday! I decided to make mini cupcakes with the Halloween themed Better Crocker cake mix. It was perfect and on sale at walmart. I found the spider rings and spider mini cupcake cups at the dollar store! I made the cakes Thursday night and was planning on decorating them Saturday morning before Christy's party, but was not expected the famous October Blizzard of 2011. I had to make due with what I had, because there were no cans of frosting anywhere in my house. I pulled out my mom's old Betty Crocker cook book and found this recipe for Chocolate Sour Cream Icing.

Chocolate Sour Cream Frosting
5 1/3 tbs butter
3 cups confectioners' sugar
1 teaspoon vanilla extract
3 squares melted unsweetened chocolate
1/2 sour cream

Melt chocolate squares as it says in the directions.
Beat butter and melted chocolate squares.
Slowly add in the confection sugar.
Add the vanilla extract and sour cream.
Mix until creamy.
Store in fridge until ready to frost.
Best part: Decorate!


I separated the frosting batter into two, dyed one orange, the other black-ish. I think they turned out more gray and pumpkiny colored but you'll get the idea. Sadly, I wasn't able to attend Christy's party due to the road/snow conditions, but I will be saving them to take them up to her house later this week. I also have extra to bring into work!

Enjoy!
xo


August 22, 2011

Tie Dye Cake

Alright, people! I know this is wayyyyyyyyyyyy late but I finally have the time and productivity to finally blog about my tie dye cake that I made for the WCB Luau. I’ve seen this recipe before (http://www.omnomicon.com/rainbowcake) and I couldn’t wait to find the best time to make it. And what better time than a colorful Luau party on the beach?

Tie Dye Cake


-          Cake Mix (white or yellow)
-          Oil (or apple sauce), Eggs,  Water 
-          Food dye (4+ colors)
-          Toothpicks
-          Bowls
-          Icing (vanilla or cream cheese)
-          Cake pan
-          Pam or shortening
-          4 color mixing bowls with 4 spoons

I can’t think of anything else but the pictures should be informative enough. I hope… One quick note would be that I substitute equal parts oil for apple sauce. Also, I made my own homemade cream cheese icning.. I'm not gonna go into detail on what it involves because that's not the point of this post so if you want to make you're own go here - http://allrecipes.com/Recipe/cream-cheese-frosting-ii-2/detail.aspx

I used two 8in round pans for my cake. I figured I would just stack them instead of trying to fit the batter in a rectangular pan and the tie dye pattern might not turn out right. I hope that makes sense. So anyway, I took the 2 8in pans and sprayed them with pam. I love pam... it makes my life so much easier and I dont have to worry about spreading NASTY shortening.


I then started to mix the cake batter. 


After the batter is mixed, I laid out my separate color mixing bowls.


I divided the batter up evenly into the four bowl and added the food coloring until the colors looked right. 


Look at these beautiful colors...


I started pouring - LITTLE BY LITTLE - the colored batter into the round pans. It is important to pour the next color right in the center of the previous color. It will not mix, and will spread out evenly.


Like this...


Until you see multiple colors like this... 


Next step: take your tooth pic and pull your colors around. I made a flower looking design. Don't pull the colors around too much because you will loose the colorful aspect and start making giant brown spots. 


The other cake looked like this... Before


Bake the cake as desired on box instructions. Easy, right? 


Now for the set up... Place the cake you want to be on bottom on the serving dish and generously layer the top of the round cake with icing. This will hold the cakes together.


Place the top round cake on top of the icing. 


Take the rest of the icing and separate it into four mixing bowls.


Add the food dye until you get the colors you desire.


Start experimenting and just throw the colors on the cake. That's what I did. Just make some blobs of color. 


Then when your cover the top and sides of the cake, take the back of your spoons and just lightly pull the colors together. Again, don't do this too much or it WILL turn brown.

My finished cake...


I'd like to say it was a hit, but I kinda just cut it up, placed it on the dessert table, and danced the night away in the rain with some of my favorite friends and family. You'd think having a dance outside in the rain would be crappy... but it was so refreshing and fun! Everyone came and told me the cake was awesome and really cool looking and that was all I needed to hear. I didn't make it for the taste, and Better Crocker is not one to mess with ;)... 

In all honesty, I had no time to head to the store and get ingredients for a home made cake. I had just came home Thursday from not being home all week and was leaving for the beach Friday afternoon and still needed to pack. It was going to take forever to decorate it, so I just made the cake and decorated it at the beach Saturday, a few hours before the dance.

Sorry most of this post is a lot of pictures and one liners. I really have nothing more to say and the pictures explained it all. Sorry this is so late. 

Enjoy! xo

August 4, 2011

Serafina Outside Dining!

This week I had the pleasure of staying a few days in Philadelphia for two reasons: Spend time with my boyfriend, and interview with PECO! And let me tell you, I was so excited/nervous for that interview. Since I arrived a day before the interview and wanted to clear my head before my "Interview Preparation" (as I say...), Matt and I went out to eat for dinner. We wanted to try this new restaurant that just opened up Serafina! (http://www.serafinarestaurant.com/serafina/)


We arrived there around 6 pm and there was seating available outside so we opted for that. It was a nice day.. not too breezy so hopefully we wouldn't choke on city dust. We had a pretty good view of the city from where we were sitting.

We started out with the Tartare Di Sofia (MENU: "A selection of the best tuna and salmon marinated in a special sauce, the Italian ways") as our appetizer. It was so fresh and tasty. The display was unique, though I didn't understand why they only gave us three pieces of toast. It wasn't symmetrical and that bugged me I guess. Regardless, it was very good.


 Matthew got the Grilled Steak & Fries, of course! His dish came with some grilled zucchini and a basket of french fries. French fries were pretty plain and not that special and his steak was not medium rare, but a little more well done. (I didn't get a picture of his because he "dug in" right away!)

I got the LE CRESPELLE DI SOFI (MENU: "Fresh spinach & ricotta crepes with tomato, Parmigiano & basil sauce"). I must say, I normally don't like to mix tomato sauces with spinach but it was really good. I couldn't stop eating it! I've never had pasta crepes before, but it was really enjoyable. Reminded me of Spinach & Ricotta Raviolis. The sauce was chunky (in a good way) and I could taste the herbs in every bite. I even showed my Italian side and cleaned my plate up with some leftover bread in the bread basket. Matt told me the french word for it during dinner as he made fun of me, but I can't remember it right now. :)


Overall, Serafina was very nice and the service was great. Our dinner (with one beer) was more than $50 dollars, which I think is a little over-priced, but I would return there.

Okay, that's all for me. Keep an eye out for my next blog early next week about my Tye-Dye Cake! The cake is all made, but I'm waiting for Saturday to do the Tye-Dye icing and put it all together! Hopefully it will be a hit at the Luau!

Enjoy! xo

July 18, 2011

Chocolate Chip Zucchini Cupcakes

This weekend was my White Crystal Beach family and friends graduation party for me. My mother already had food planned out, but we couldn't figure out what to made as dessert. It just so happened that my mom picked up a 5 lb zucchini from the beach last weekend so I wanted to made zucchini bread! We went to Maple Hoff 2 to pick up some sweets and we were talking about what to make with the zucchini and the lady at the counter told us about chocolate chip zucchini cookies. I wasn't really sure about cookies... but I'd love to make chocolate chip zucchini cupcakes. 

Chocolate Chip Zucchini Cupcakes with Cream Cheese Icing


Cupcakes (Makes 1 dozen)
1 1/2 cups all purpose flour
1/2 cup brown sugar
1/2 cup granulated sugar
2 tsp baking powder
1/4 tsp baking soda
1/2 tsp salt
1 tsp cinnamon
1/2 cup chocolate chips
2 zucchinis, shred (about 2 cups)
2 eggs, lightly beaten
1/3 cup oil
Cream Cheese Icing

First off, can you just look at the SIZE of this zucchini? I am amazed that I only have a little bit left after making two batches of this recipe!! 


Preheat the oven to 350 degrees. The first thing I did was cut it to manageable sizes and cut the skin off. If you want to use a peeler, be my guest, but it's easier to just run a knife down the sides.


Cut out the center seeds. I used the knife to get it out, but you can use a spoon. 


At this point you can either cut the zucchini in cubes and put it in the food processor like I did, or use the pieces like seen above and use a grater to cut it up. It would of taken me forever to grate that amount of zucchini, so I cheated. :)


Place zucchini, eggs, and oil in a large mixing bowl. 


Mix dry ingredients in another large mixing bowl.


Incorporate the chocolate chips.


 Slowly add dry ingredients to wet ingredients while mixing until completely incorporated.


Line pan with cupcake cups. Fill cups 7/8 of the way up.


Place cupcakes in oven and bake for about 30 minutes or until a toothpick inserted into the cakes comes out clean.


Now, I'll show you a quick and cheap trip to icing your cupcakes... Take a regular sandwich bag and line it in a cup. Fill the bag with icing.


 Pull the bag out and twist the top together.


Without squeezing the bag, cut the tips off of a corner.


Create your own way to decorate the cupcake. I swirl. :)


Everyone at the graduation party loved them. They were moist and tasty and comforting. It was a wonderful idea for the party.

Enjoy xo